
Custom Filters
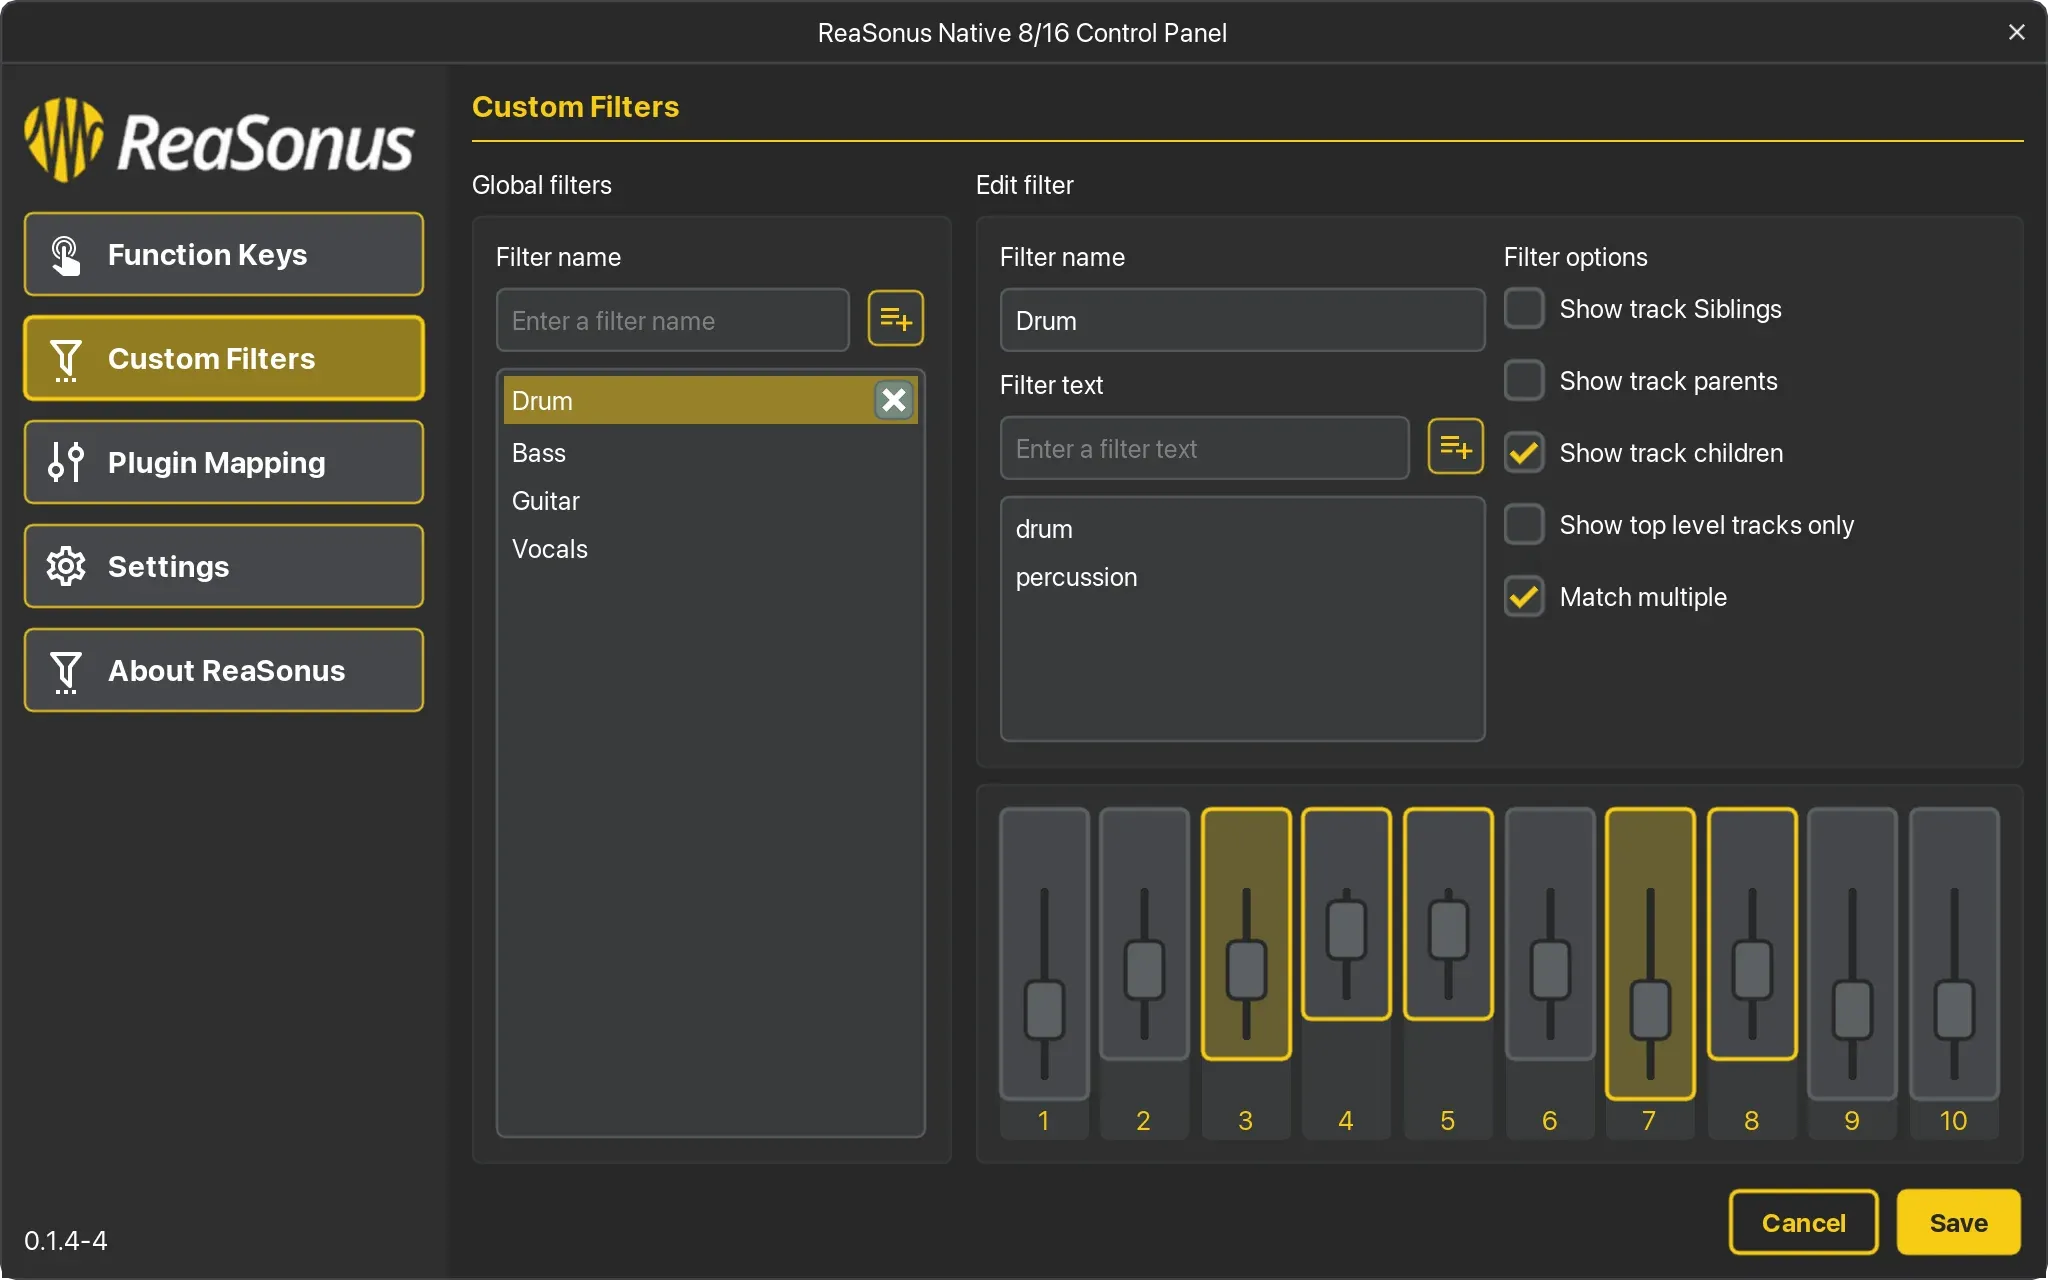
ReaSonus Native has the ability to create and manage your own track filters. The filters are based on file names with additional options. To open the window click the Macro-button. Or select the Custom Filters tab in the ReaSonus Control Panel.
Don't forget to click the save button when you're done editing.
Adding and removing filters
The left side of the window contains the list with available filters. If you want to delete a filter, select the filter in the list and click the 'X' button on the right
Adding a new filter is as simple as deleting one. Enter a name in the input field above the list and click the '+' button.
The order of the filters on the FaderPort is the same order as they appear in the list. You can change the order by dragging and dropping the items.
The Filter Options
The first match the filter makes is by name. If no name is provided, no tracks will be visible by selecting that filter. After the name the filter is checking by the given options.
- Filter name: The name of the filter. This will be the name used in the list on the left side and in the displays of the controller.
- Filter text: Adding a text can be done by entering it in the input field and click the 'plus' button. Removing an item can be done by selecting it and clicking the 'X' button on the right.
- Case Insensitive search: Search case insensitive
- Show track siblings: Show all the sibbling tracks of matching tracks
- Show track parents: Show all parent tracks of matching tracks
- Show track children: Show all the child tracks of matching tracks
- Show only top level tracks: Shows only the filtered tracks if they are top-level
- Match multiple: By default the names wil only match the first item. Enabling this option will show all matches
The 'Preview'
There is a 'Preview' available that represents your settings. The 2 channels with the dark-yellow background represent tracks that match the name. The ones with the bright yellow border will be the ones that will be visible after using the filter.
This 'Preview' should help you a bit with understanding the effect of the different filter options and how they interact with each other
Using your own filters
To use your own filters press [Left Shift] + All. This will show all your self created filters in the displays. If you have created more then 8/16 filters, use the pan encoder to scroll to the next filters.
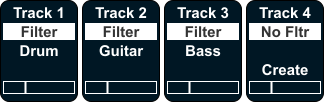
If there is a filter available press the Select-button to select the filter. The All-button will now be yellow, to indicate a filter is activated.
There is also an option to enable multiple filters at the same time. To do this use [Right Shift] + All. The same appears above, but now selecting a filter will not return to Track mode, but stays open to select more filters. When done, click [Left Shift] + All again and the filters get applied.
In the settings is an option named: Instant apply filter in multi select. When this one is engaged, and you've selected multi filters, the filters get applied once selected.
If no filter is available, the display tells you so. Pressing the select button then will ask you if you want to open the Filter Management window.