
Plugin Mapping
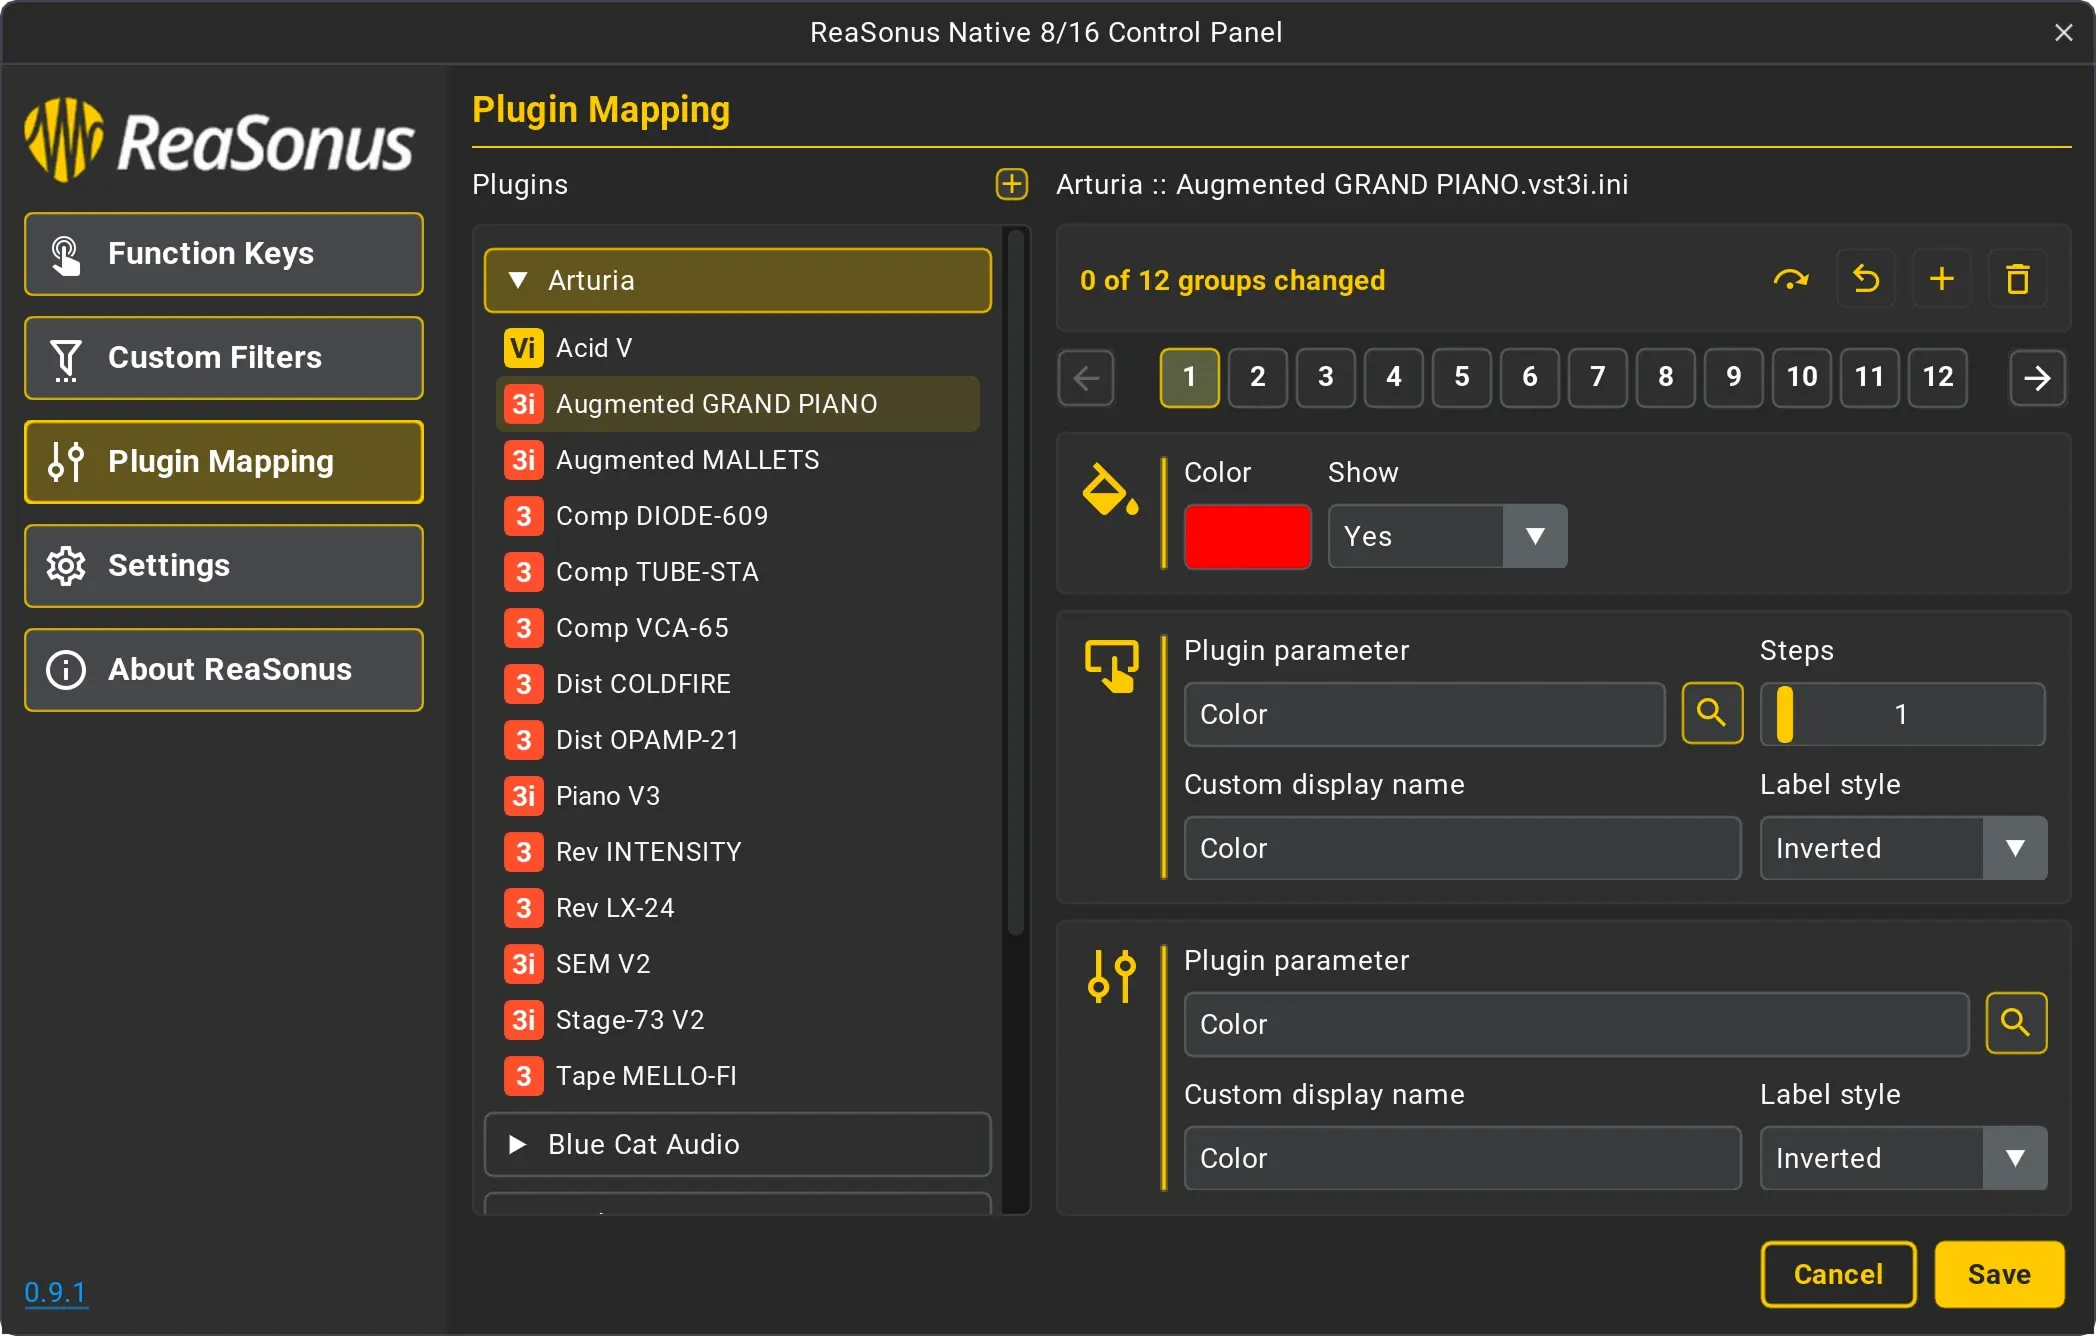
ReaSonus Native has an extensive way of mapping plugins. There are multiple ways of managing the mapping of plugin parameters. By far the easiest and fastest will be via MIDI Learn. This will let you map plugins via the FaderPort, but has less options. You can also use the UI, which gives you more flexibility like the option to change parameter names, step number, colors and so on.
This is a FaderPort 8 & 16 only functionality.
Add with MIDI Learn
New Plugin Mapping
The idea about the MIDI Learn method is to make the mapping as simple as possible. When in the Plugin Channel Mode:
- Press the [Solo] button to open the window of that plugin.
- Press the [Link] button will open the editing mode. If no mapping has been done for the selected plugin, a new mapping will be created automatically. In this mode the button is blinking.
Now a configuration file gets created in the background and the linking is started. All displays should have 2 lines with the text Free in it.
Now you can wiggle/touch a parameter in the plugin and then press the [Select] button of the channel you want to assign it to or touch the fader of choice. This should change the text Free to the name of the parameter (The top one for the select button and the bottom one for the fader).
The [Select] button can be used for toggle buttons (on/off) or plugin parameters with a limited amount of steps. In that case, when the correct data is available from the plugin, pressing the [Select] button will loop through the options
If all channels are populated (or earlier) you can use the Pan/Param encoder to scroll to a next set of empty slots
If you want to disconnect an assignment, you can press the Right Shift and press the Select button or touch the fader you want to disconnect. The connection is removed and the text will change to Free again.
Once done editing, press thge [Link] button again. Now you can use your mapping instantly
Edit Mapping
If the selected plugin already has a mapping, this will get activated instantly. If you want to make changes to the mapping, press the [Link] button. This will enable the edit mode. All values should be cleared from the displays and the empty slots will display the Empty text again.
If you want to overwrite a mapping, just wiggle/touch a plugin parameter and then select the control you want to assign it to. This will overwrite it
Overwriting names
It is also possible to overwrite parameter names. Check Plugin Mapping UI
Add Plugin Mapping in UI
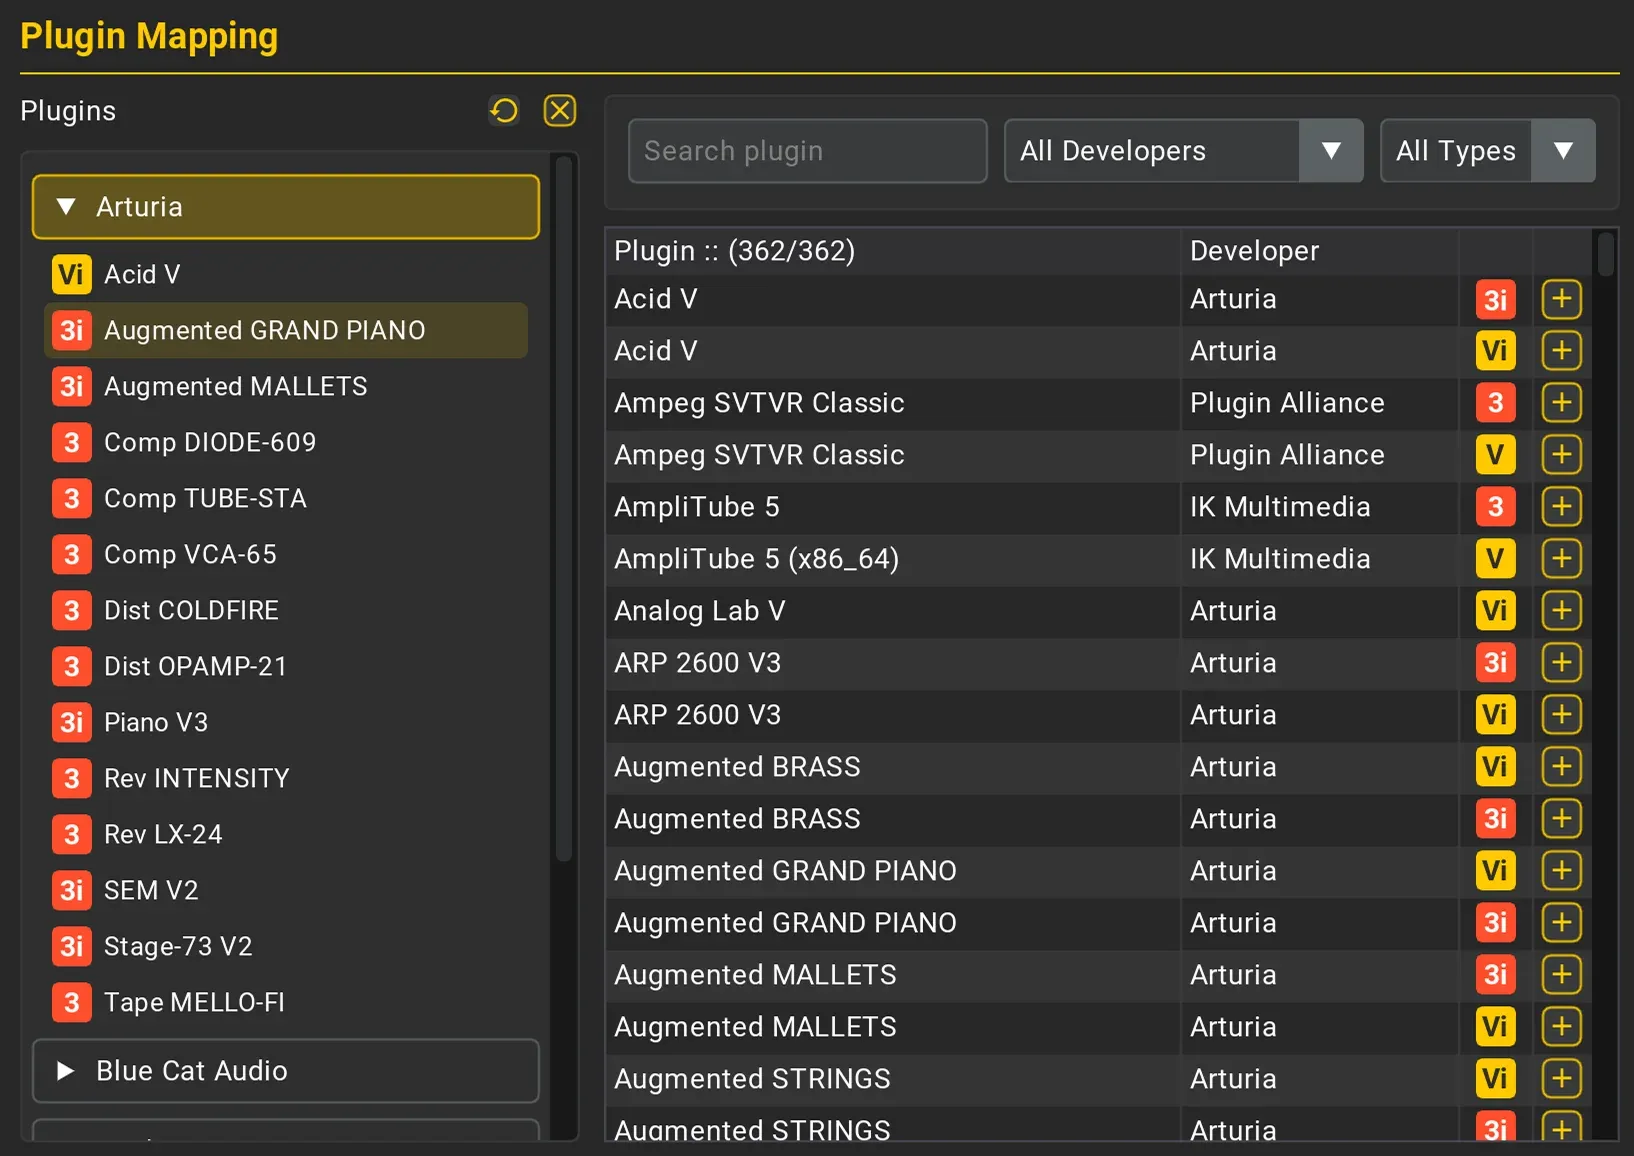
There is no need to add a plugin mapping from the controller, but it can also be done in the ReaSonus Control Panel under the Plugin Mapping page. Here are the steps to take to add a new mapping.
Start adding
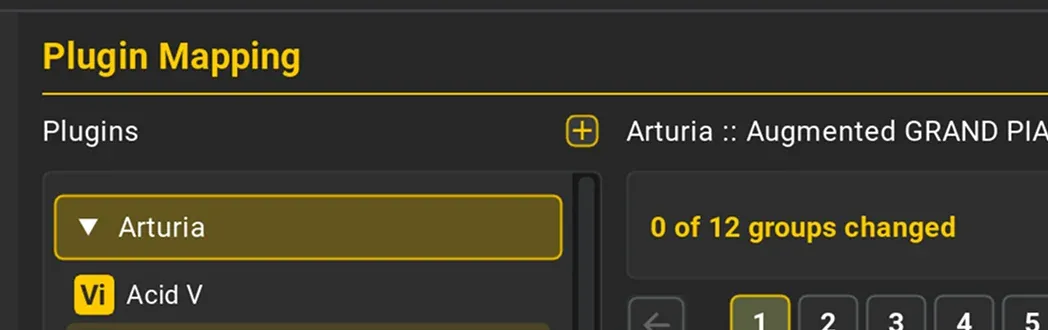
Above the mapping list you see a small Add button with a plus in it. Click this button and you'll see the list with available plugins. When opened there will also be an extra button visible with a refresh icon.
Cache
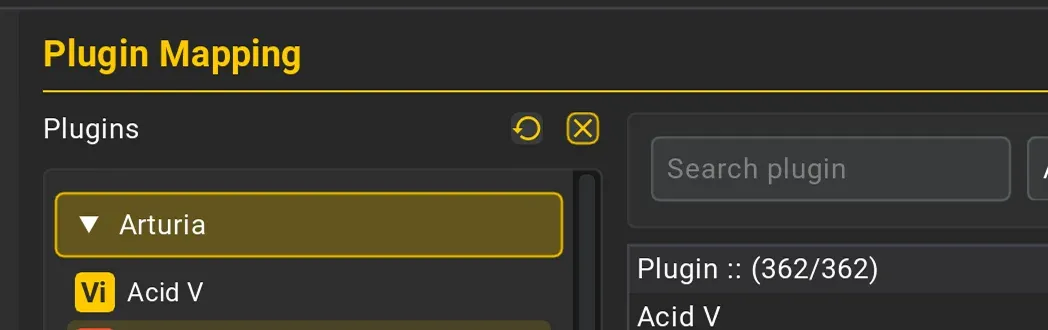
When opening the list for the first time might take a bit. This is because data about all the installed plugins will be gathered. To prevent you have to wait every time you want to add a plugin mapping, all the data will be cached, so the next time you want to add a plugin mapping, the list will load almost instant.
As there is no detection if plugins have been added, removed or updated, rebuilding the cache must be triggered manual. That's where the refresh button comes in. When clicking this button all the data of the installed plugins will be updated
Plugin List
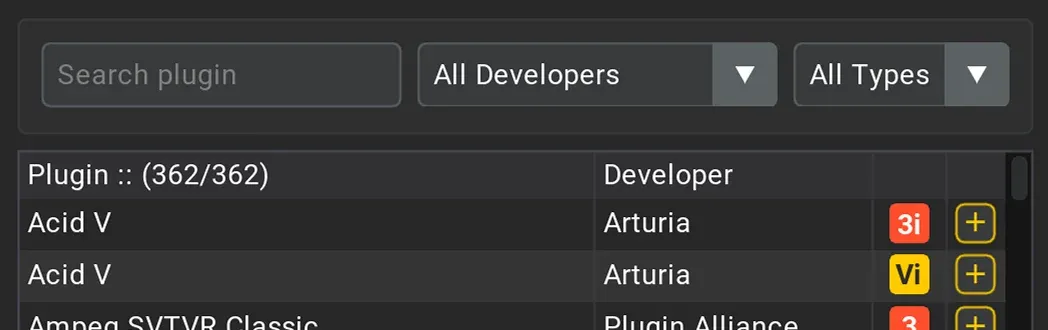
After clicking the Add button, the list with all your installed plugins will appear. Here you can select the plugin you want to create a mapping for. To make searching easier, some filters have been added:
- Search plugin: Type in a (part of a) plugin name to narrow down the selection
- Developers Combo: Select the developer of the plugin you want, to only see these plugins
- Plugin Type: Select the type of the plugin you want, to only see these plugins
All these filters can be used together to get to your plugin in an as fast way as possible
Once you made your choice, click the little Add button in the row of the plugin. Once clicked an empty mapping will be created, the list will close, and the newly added plugin mapping will be selected, so you can start setting up the mapping instant.
More Cache
As some plugins have a very large list with parameters and this might affect load times, also all the parameters will be cached per plugin. You can read more about cache, how to clear, refresh etc below
Plugin Mapping UI
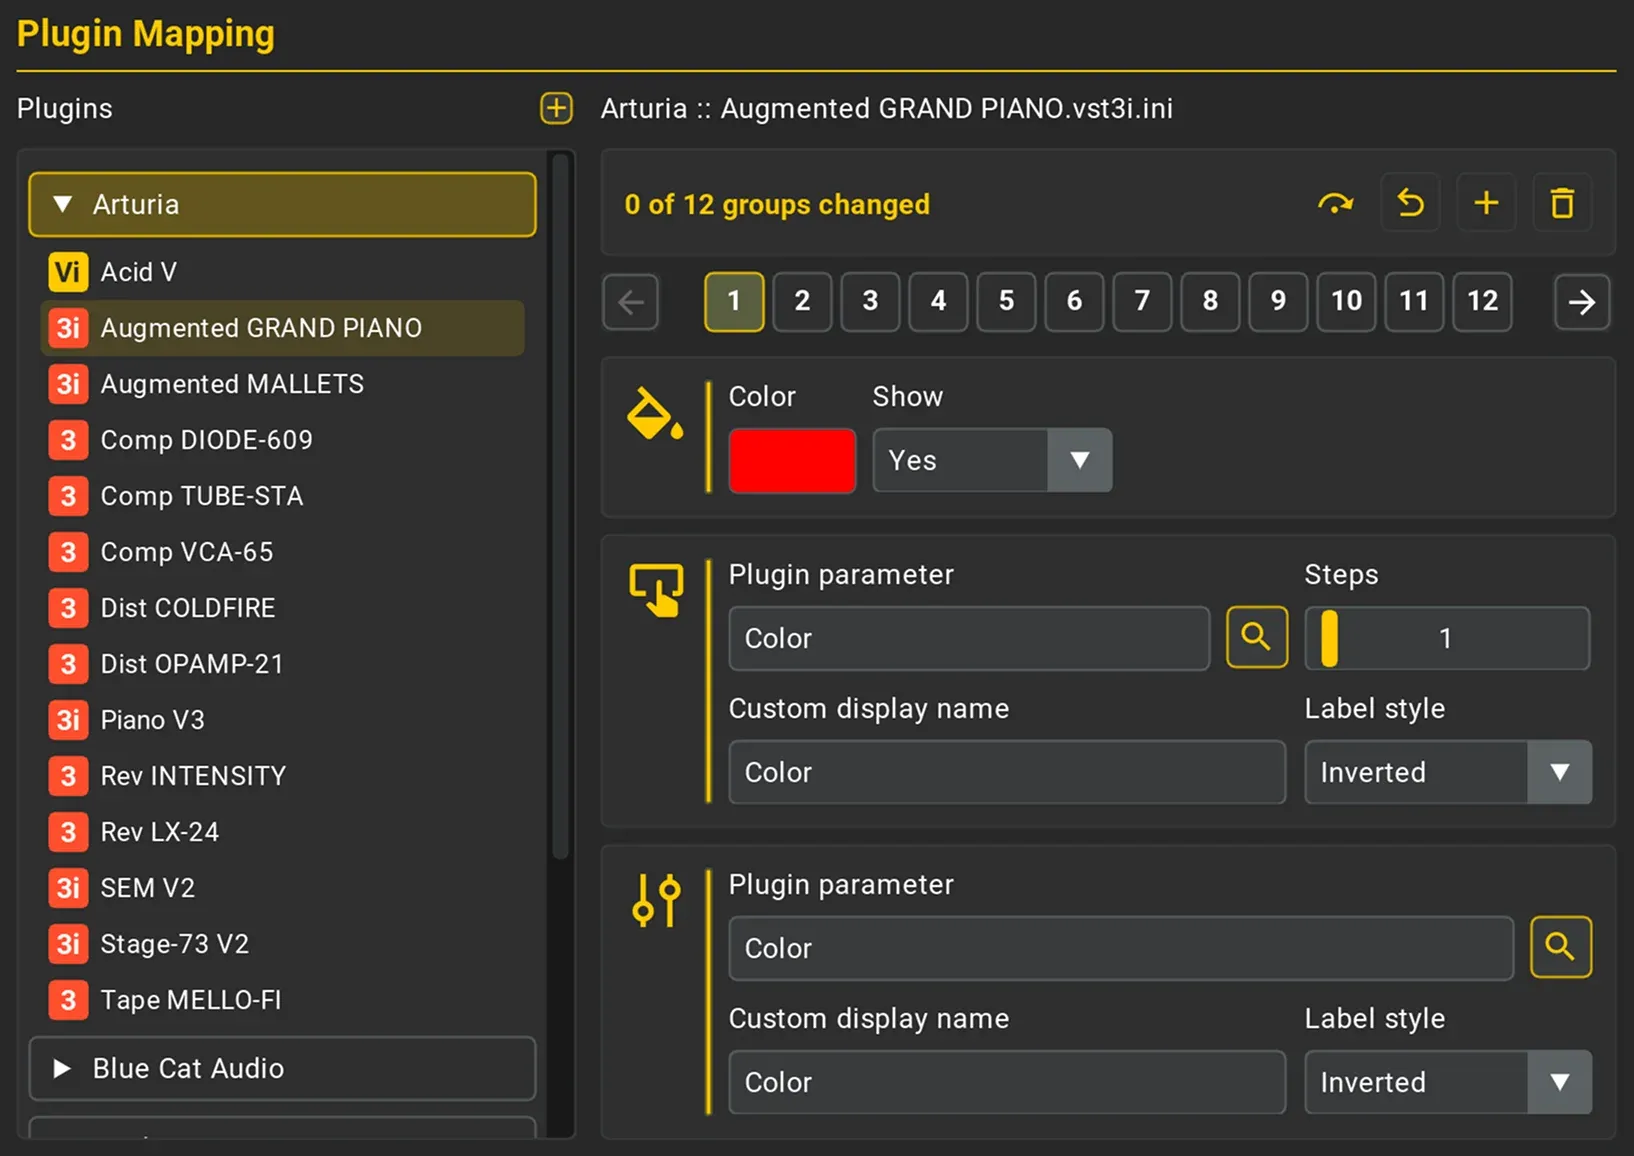
Within ReaSonus Native it is also possible to manually add a mapping or to edit some settings of the mapping. If you want to use this, do one of the following:
- Go into the learn mode. In this mode, press the [Left Shift] and press the [Select] button of the channel you want to edit. This opens the Plugin Mapping with the current effect and parameter selected. Or read the next block about adding plugin mappings in the UI
- Open the ReaSonus Control Panel and open the tab Plugin Mapping. Then you can select the developer and the plugin you want to edit.
The panel
On the left side you see the list of plugins which are already mapped. They are grouped by developer and ordered alphabetically to make searching a bit easier.
On the right side at the top you see an info bar and a list with numbered buttons. These represent the tracks you assign the controls to. When the list gets larger you can scroll through the list. Clicking a button will show you the settings for that track. The big area underneath is where the selected group will be displayed
The top bar

The top bar displays the number of edited groups and the total number of groups. Beside that info there are a couple of buttons to make your live easier:
- Go To Group: When clicking this button a little popup appears with an input field. You can enter the group number here to go quickly go to that group. When using the Enter or Escape key the popup disappears.
- Undo: Undo the changes of the currently selected group. If you want to undo all changes, use the Cancel button in the bottom of the page.
- Add: Add a new group after the currently selected group.
- Delete: Delete the currently selected group.
Navigation

Navigate through the groups. Select the group you want to edit, or use the previous and next buttons to step through the groups.
When using the Left Shift key of your keyboard and clicking the previous or next button, you will step with 12 groups. This makes it easier to step faster through teh groups when the plugin has a lot of groups.
If you want to re-order them, you can drag and drop the groups.
Color

- Color: The color that will be set to the Select button. This will use the color picker. You can modify the color palette of the color picker in the Settings.
- Show: The way the color is displayed in the Select button. The preferred default value can be set in the Settings
- No color: The Select button will always be dimmed white
- Show color: When a Select parameter is available, it will be bright, otherwise the selected color is dimmed
- Always bright: Regardless if there is a parameter set for the Select button, it will always be bright
- Always dimmed: Regardless if there is a parameter set for the Select button, it will always be bright
Select
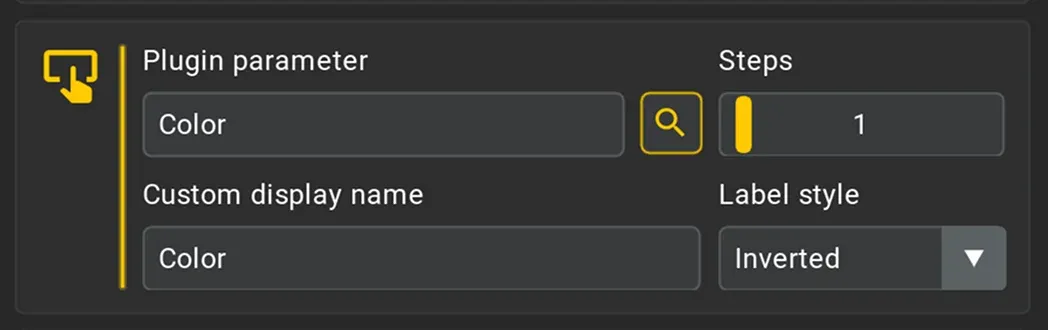
- Plugin Parameter: This is a popup with all the available parameters of the selected plugin with a search field. This makes it easier to find a parameter when there are a lot of parameters.
- Parameter Display Name: A configurable name for the parameter. This can come in handy as most times the original names are fairly long. Keep in mind that the FaderPort will display no more then 10 characters.
- Number of Steps: (Select only) the number of steps/options for the parameter. In case of on/off this will be 2 and using the select button will toggle the value. If there are more steps for the parameter, clicking the Select button will select the next available value. This can be helpful for waveform select in a synth plugin or ratio select on a famous compressor.
- Label style: Set the label style for the parameter label in the display to inverted or not inverted. This can help you organise your mappings a bit.
Fader
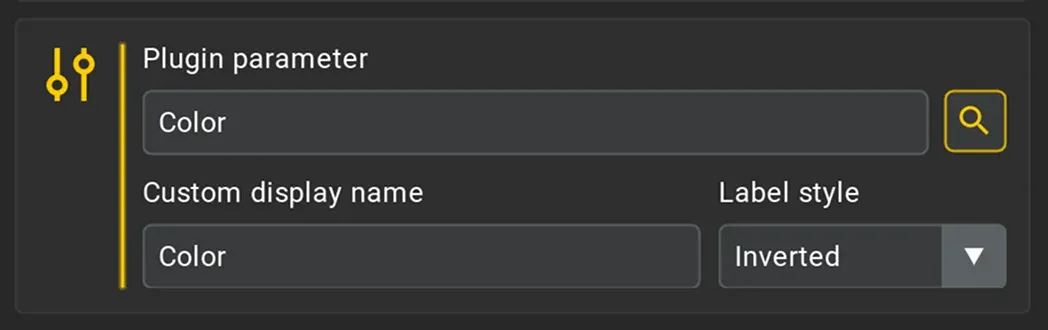
Plugin Parameter: This is a popup with all the available parameters of the selected plugin with a search field. This makes it easier to find a parameter when there are a lot of parameters.
- Parameter Display Name: A configurable name for the parameter. This can come in handy as most times the original names are fairly long.
- Label style: Set the label style for the parameter label in the display to inverted or not inverted. This can help you organise your mappings a bit.
Parameter Filters List
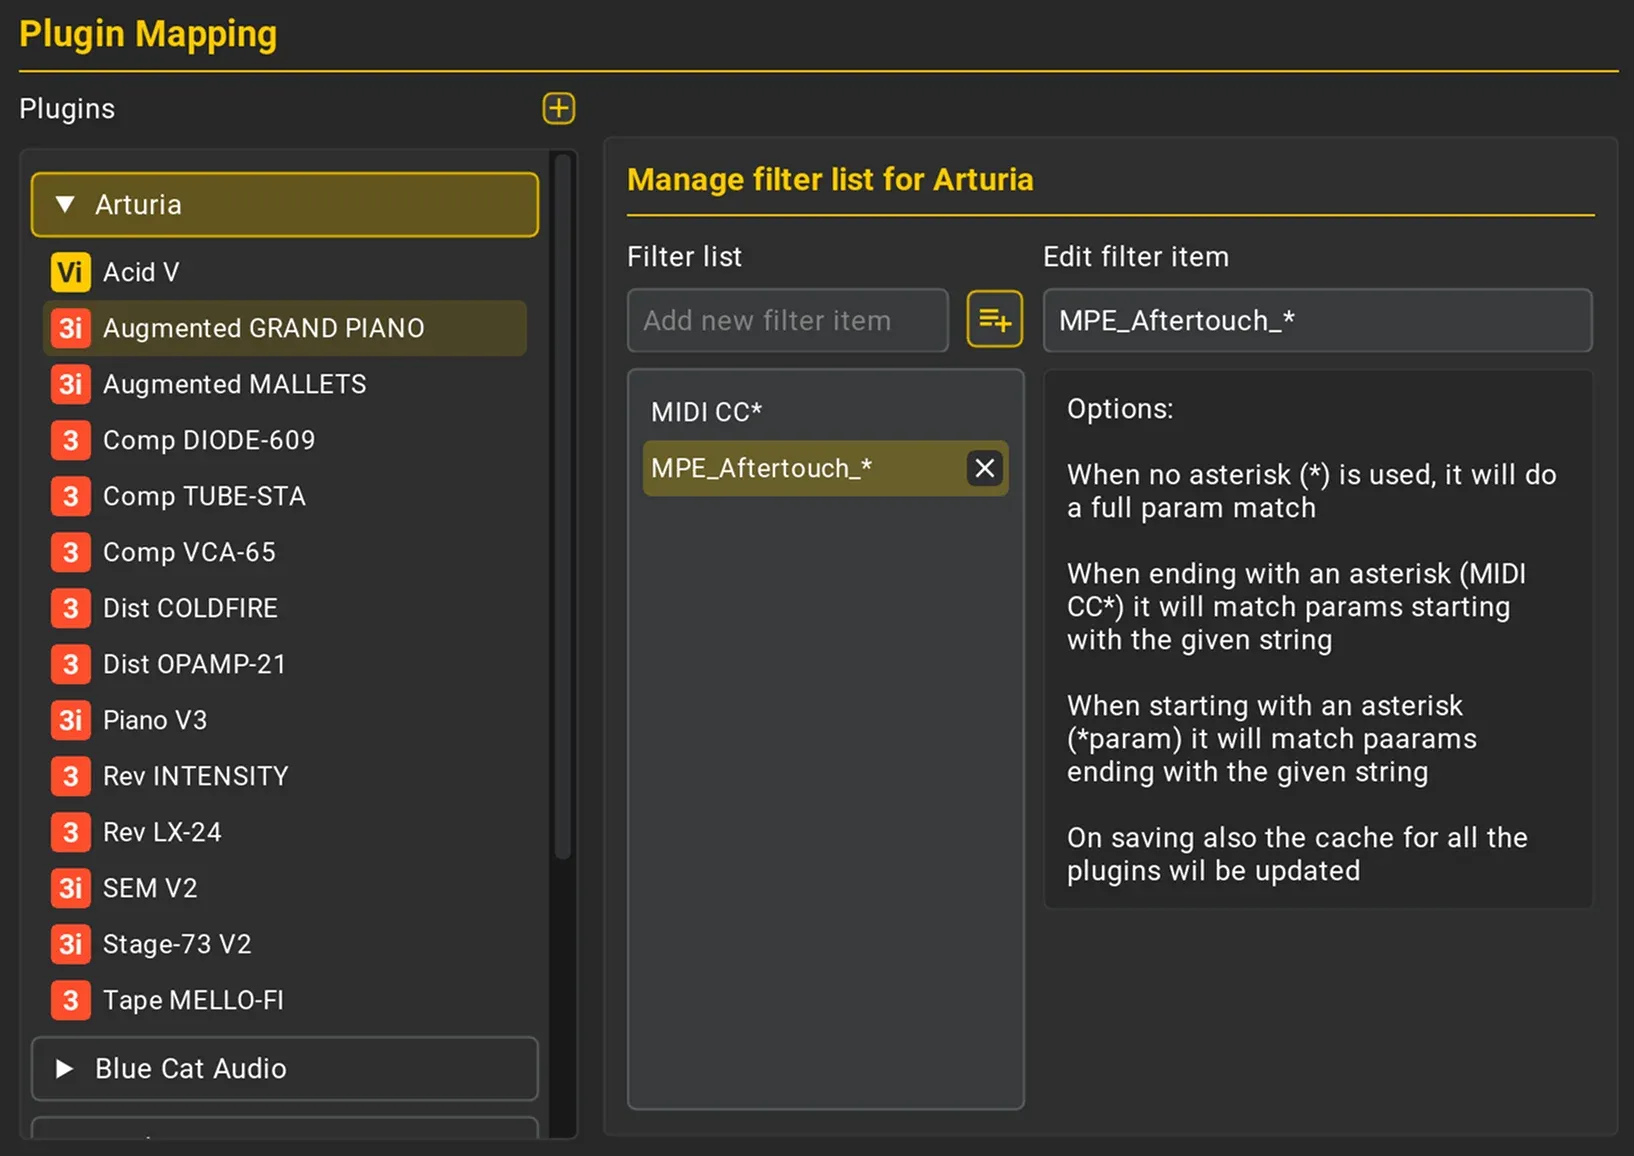
Some plugins have an extensive list of parameters. When looking closer at those longer lists, it seems that quite some of the parameters are or unused, or not useful for parameter mapping. To reduce this list there is a parameter Filter List is available per plugin developer. You can add items to the list and edit the list. Every update made to this list will update the cache for all the plugins of that developer.
So if you've added parameter A to the list for developer B, this parameter will not appear anymore in all the plugins of that developer. It will though, be available for the plugins of developer D.
Add to the block list
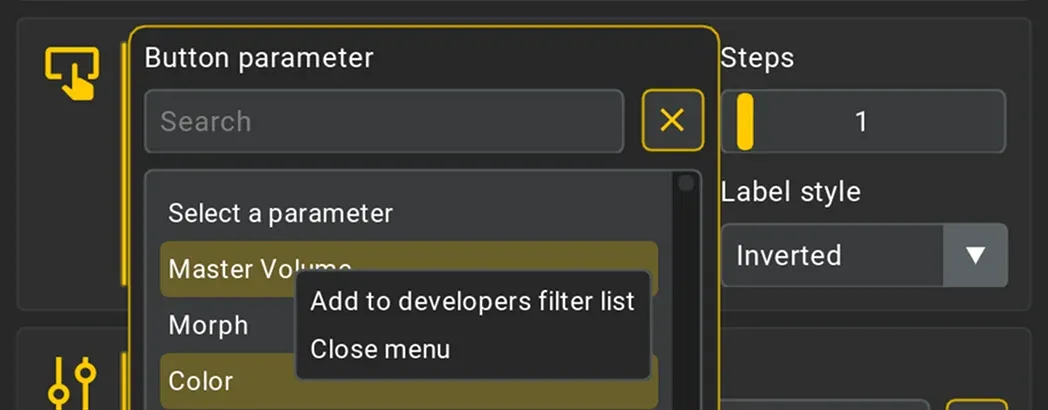
When you have a parameter you want to add to the Filter List, you have to open the parameter list and right-click the parameter you want to add to the list. A context menu appears and click the Add to developers filter list. The parameter gets added instant and all the plugin cache files will get updated with this change.
Manage the Filter List
To add, edit or delete items to the Filter LIst, or make a filter more generic, you can do that in the Manage filter list for... page. To open that page, right-click on a plugin of the developer you want to edit the list for.
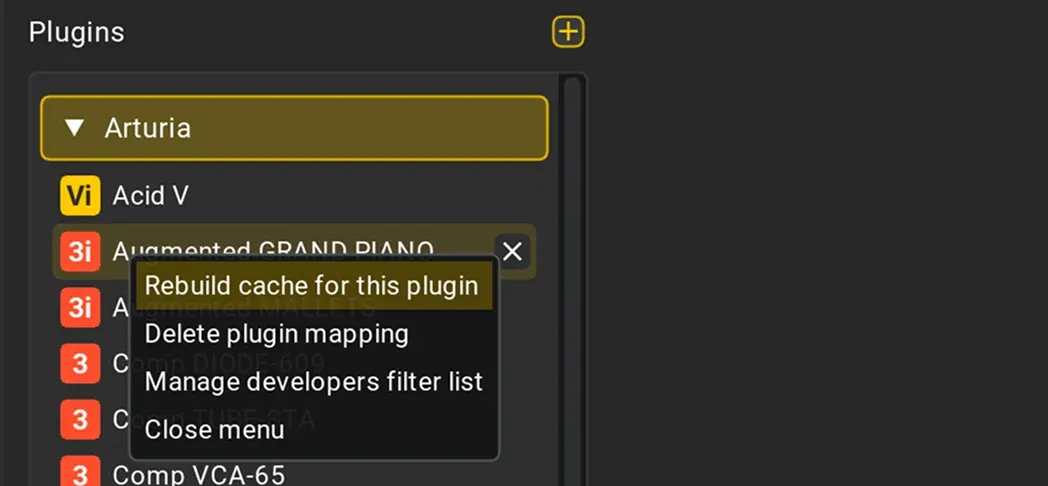
A context menu pops up and then select Manage developers filter list and the page will appear. Now you can start editing the Filters List.
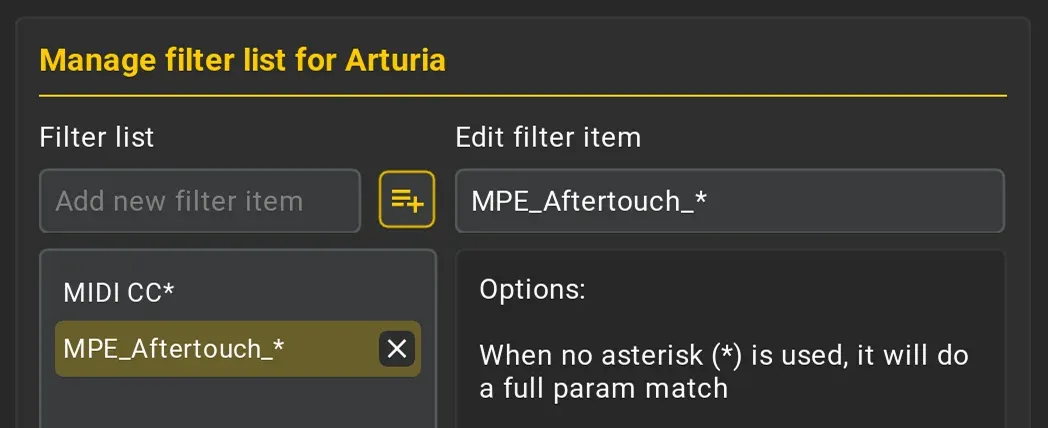
You can add a new item to the list by typing the filter name in the Add new filter Item and click the Add button.
If you want to delete an item, you can hover the mouse over the item. A Delete button will appear, click it and the item will be removed from the list.
You can also edit the items or make them more generic. Select the item you want to edit and it will appear in the Edit filter item field. You can now edit the item. Changes will be reflected in the list as well.
To make an item more generic there is the option to use wild cards. By default the parameters need to fully match the filter name, but adding an asterisk (*) will change that behaviour.
- param*: When the asterisk is placed after the name, it will match all parameters starting with the given text. In this case any parameter starting with param like params, param_1, etc will match.
- *param: When the asterisk is placed in front of the name, it will match all parameters ending with the given text. In this case any parameter ending with param like 1_param, trackparam, etc will match.
If you want to undo all your changes, click the Cancel button. Saving the changes is by clicking the Save button. On saving the changes also all the plugin cache files will get updated, so all changes are available instant
Plugin Cache
To increase performance for mapping plugins there are a couple of elements that get cached. As Wikipedia states:
In computing, a cache is a hardware or software component that stores data so that future requests for that data can be served faster; the data stored in a cache might be the result of an earlier computation or a copy of data stored elsewhere.
All the different types of caching used will be described here.
Installed plugins cache
Installed plugin cache stores all the installed plugin data to a file (InstalledPlugins.ini). Data stored are:
- Original name used by REAPER
- Developer
- Short name (actual plugin name)
- Plugin type
- Category (currently not used)
This is currently used for adding a plugin mapping in the UI. When adding a mapping in the UI for the first time, the file gets generated and might take a while (depending on the amount of plugins).
This file does not get updated automatically, so when adding or removing a plugin the cache file does not get updated. If you want to update the cache file, because of missing plugins, go to the add plugin mapping page and click the refresh button above the plugin mapping list.
Plugin parameter cache
Plugin parameter cache stores all the plugin parameters in a single file. While generating the cache file the parameter filters list is taken in account. So the parameters matching the filter list, will not be available in the cache file. Beside some global plugin info, the next values are stored per parameter:
- Parameter Id: the index of the parameter
- Parameter name
- Number of steps
The cache file gets generated and updated in the following situations:
- When creating a new mapping (this can be either via the controller as via the UI)
- When updating the parameter filter list.
You can also trigger an update yourself:
- In the Plugin mapping plugins list, right click the plugin you want to regenerate the cache for. A context menu appears. Select Rebuild cache for this plugin and the cache gets rebuild
Unknown Plugin Type
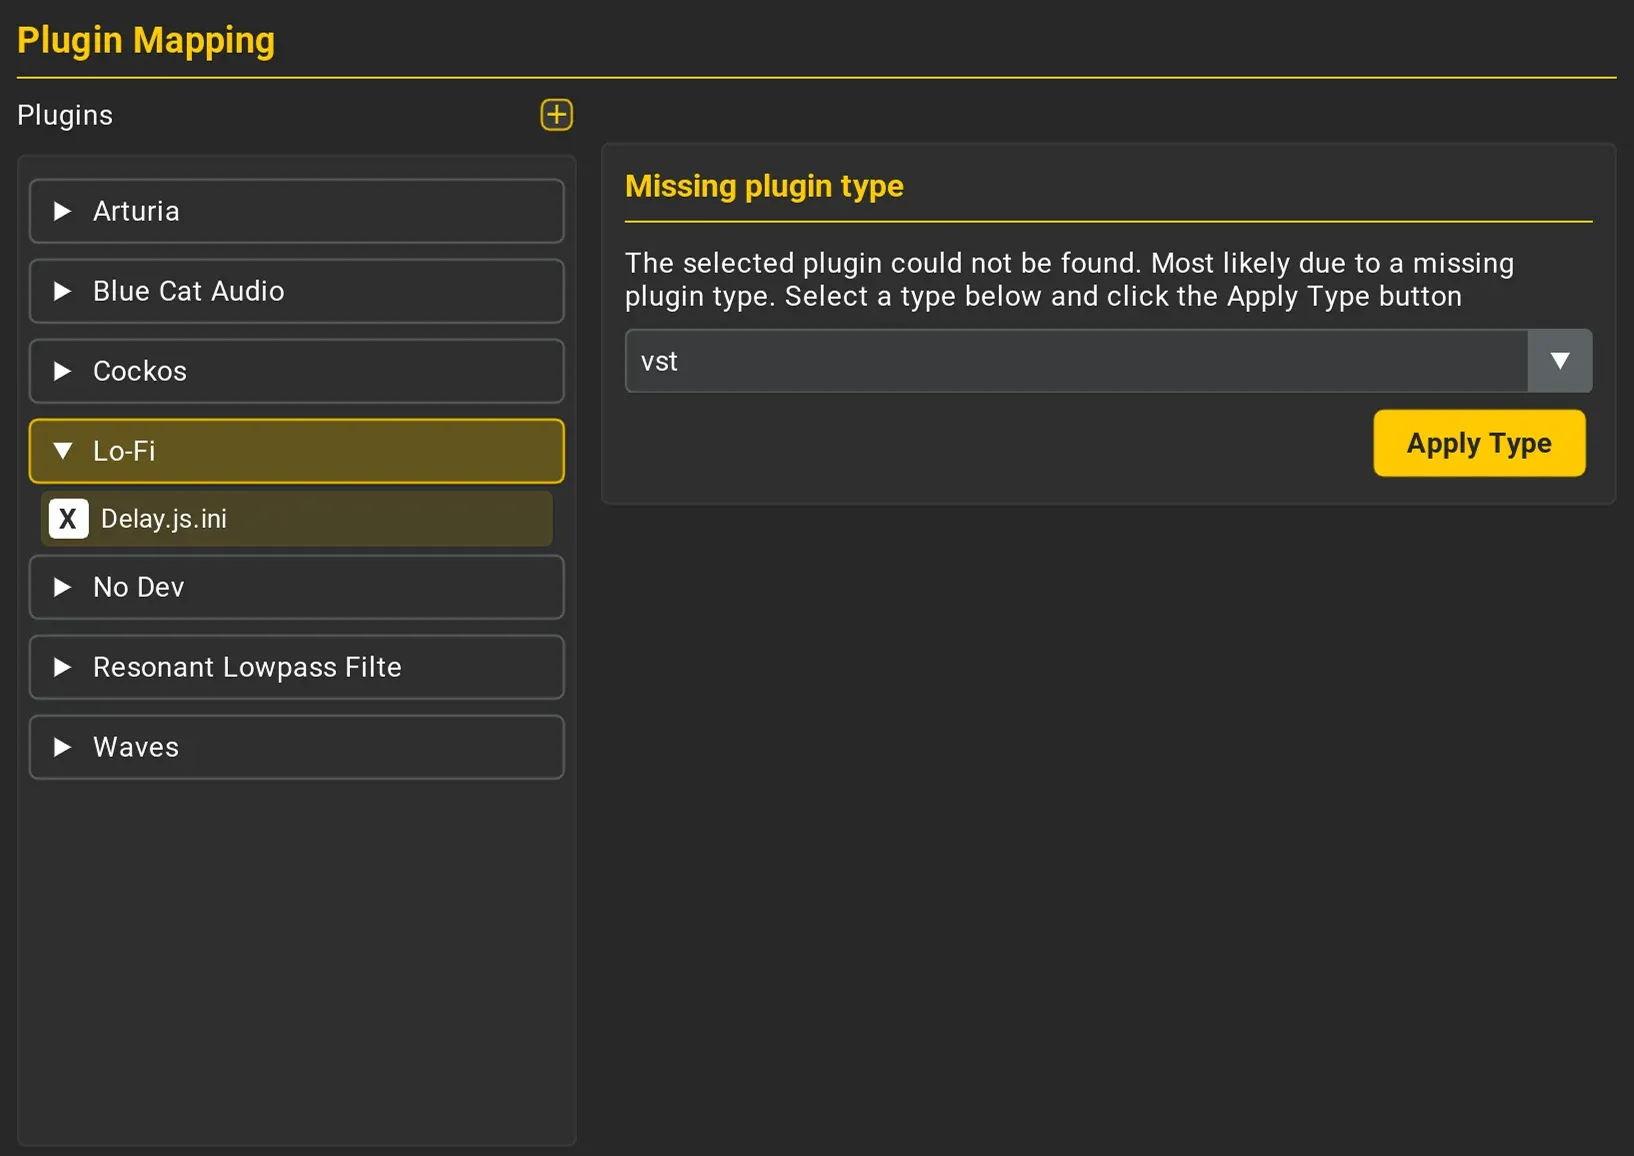
When having created plugin mappings before version 0.8.0, there might be an issue with a missing
plugin type in the mapping file. There is an action to fix this for all the files with a missing
plugin type. In the REAPER's actions list search for
_REASONUS_FP8_TOGGLE_MOMENTARY_MUTE_SOLO and run it.
When selecting a plugin in the Pugins list and that plugin does not have a plugin type in its mapping file, a appears that asks you to select the correct type. Once selected the file gets udated, and reloaded to open the mapping page for the selected plugin.